Creating and Using an NDEx Account
Last updated: December 14th, 2018
Overview
This manual is a step by step guide that shows how to create and use an NDEx account. Please review it carefully as it provides important information required to use all NDEx features.
Register an account
- On the NDEx landing page, select the blue Login/Register button on the right hand side of the top menu bar:

- Now, you can create a new account either using your existing Google account credentials (faster, safer and preferred), or choose the basic option on the right by clicking the link "Click here to sign up".

- When you choose the new, preferred option, a dialog window will appear where you can select the Google account you want to use for authentication
- Choose the Google account you wish to use as shown below:
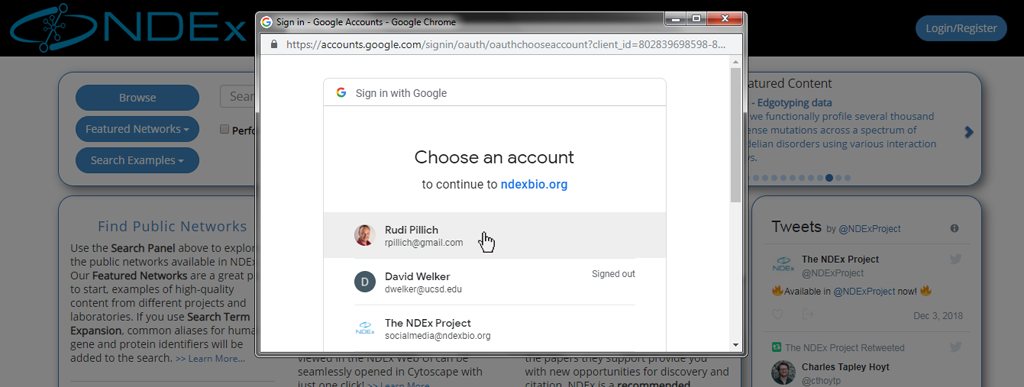
- In the next screen, review and accept our Terms & Conditions, then click the blue Sign Up button and your new NDEx account will be created automatically in a just a few seconds:

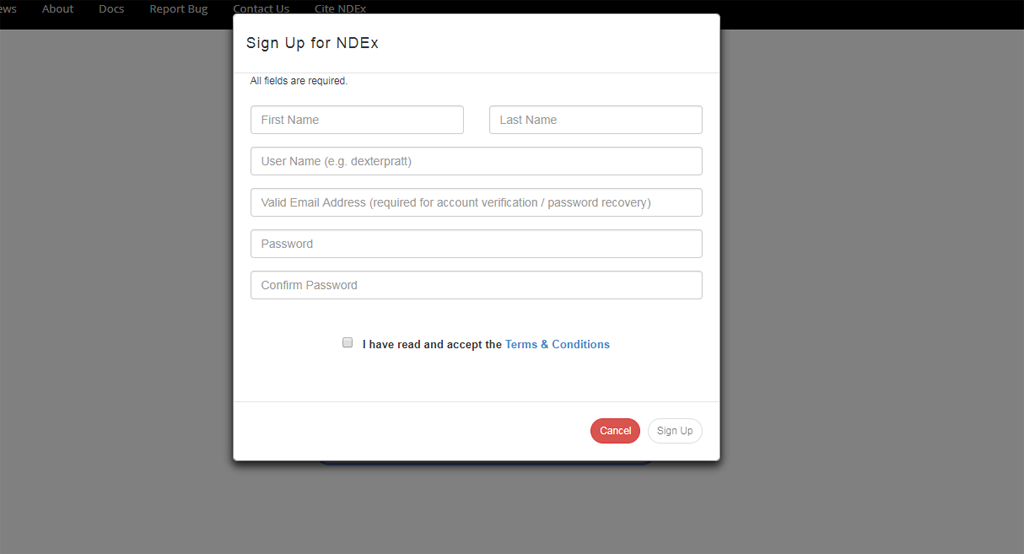
- If you don't have a Google account or don't wish to use it to automatically create your NDEx account, you can always use the basic option as shown below:

- After clicking the link, a sign up form will be displayed.
- All fields must be filled in order to sign up and the system does not allow duplicate account names or email addresses.
- We recommend you use your Gmail address (if you have one) so that later on you can take advantage of the "Sign in with Google" feature. If you already have an NDEx account, you can update your existing email address and substitute it with a Gmail address to start using the feature.
- Please make sure to review and accept the terms and condition before proceeding.
- After clicking "Sign Up" you will be required to check your email to verify and activate your new NDEx account.
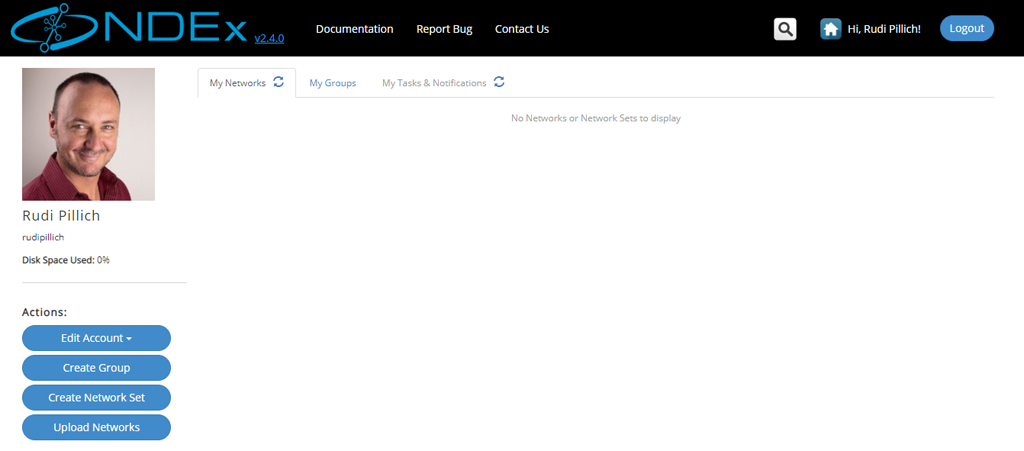
"My Account" Screen
- Once signed up, you will land on your "My Account" page. This page has 3 tabs that will show all the Networks that your account manages, the Groups to which the account has direct access and your Tasks & Notifications.
- As soon as you create your account, it will look empty like the one in the image below:
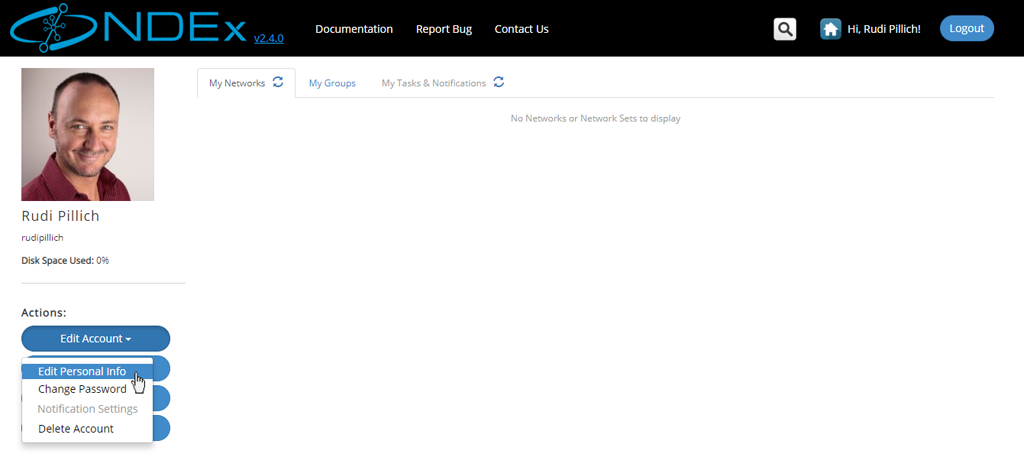
Edit Profile
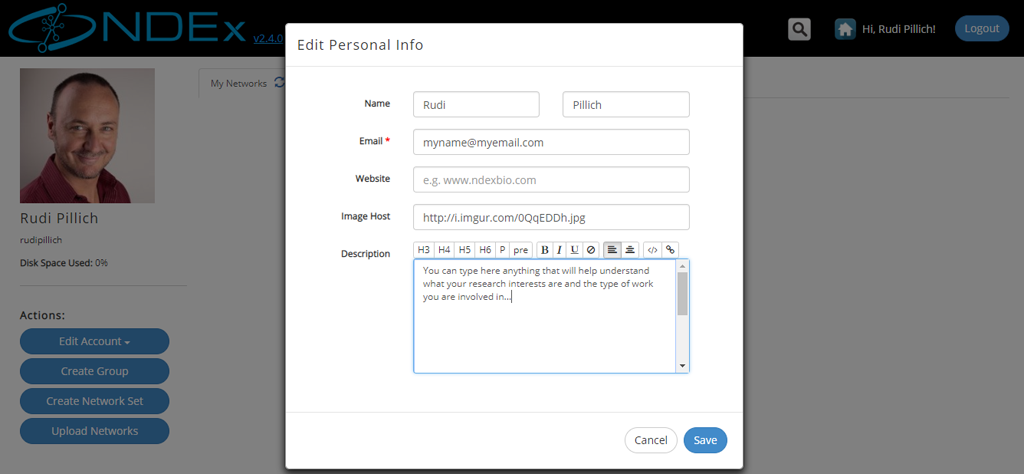
- Click the blue "Edit Account" menu button on the left of the user page and select "Edit Personal Info"
- The same blue "Edit Account " menu button also allows you to "Change your Password" or "Delete you Account"
- You can fill out the fields in the displayed dialog box if you want... the only mandatory field is the e-mail address.
- We recommend you use your Gmail address (if you have one) so that later on you can take advantage of the "Sign in with Google" feature. If you already have an NDEx account, you can update your existing email address and substitute it with a Gmail address to start using the feature.
- Click submit to make the changes.
- (Note that if you do not already have an image URL, you can use an image hosting site such as http://imgur.com to store an image and then reference it from NDEx.)
Groups
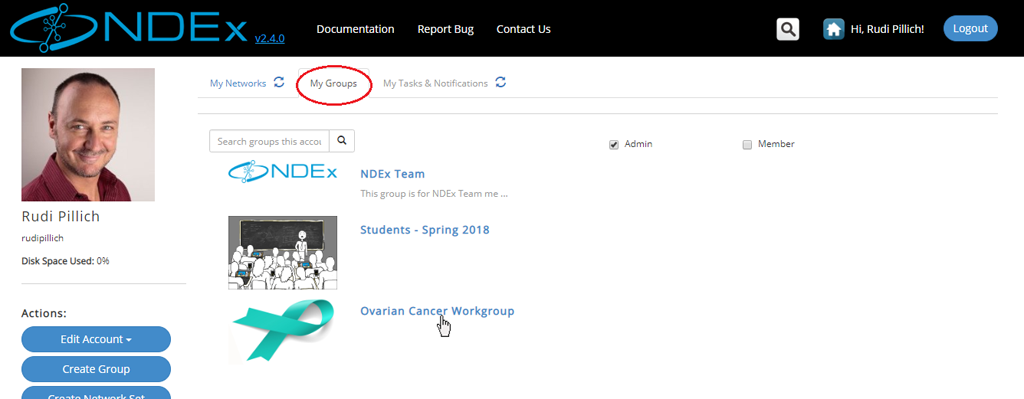
- On the account page, all groups in which the user is member of can be seen by clicking on the "My Groups" tab
- You can also filter by name or role in a group using the search bar and checkboxes
Requests and Tasks
- Requests and Tasks relative to your account activity are displayed in the "My Tasks & Notifications" tab
- You will receive a request ONLY if you are the admin of a group or network another user wants to join or access, respectively.
- You can use the "refresh" icon on each of the panels to update the content.
- Individual tasks can be deleted by clicking the trash can icon.
- Click on a received request to respond; click on a request you have sent to delete it.
- Click on an export task to download the network in a specific format.
