Uploading and Sharing Networks
Last updated: December 12th, 2018
Overview
There are several ways to upload and share networks in NDEx and this page provides a short review of the available options.
In NDEx, users have full control on who can and cannot access their networks. Besides setting the network visibility, users can also decide to grant access to their network to specific NDEx users for collaborative purposes. Users can also request access to networks they do not own but they are interested in.
Please note that a free NDEx account is required to upload and share networks in NDEx. You can visit THIS PAGE for details about creating an NDEx account.
Uploading via Cytoscape
The easiest option to load your favorite networks to NDEx is to use Cytoscape. The latest Cytoscape 3.7 has built-in full integration with NDEx; thanks to the CyNDEx-2 Core App, loading and retrieving networks form NDEx it's easy and fast. If you have your network in Cytoscape, it's just a couple of clicks to upload it to NDEx.
A quick guide with screenshots is available in the CyNDEx-2 App Store page; alternatively, instructions can also be found in the Cytoscape Online Manual.
Uploading Programmatically
Computational savvy researchers and bioinformaticians can upload networks via their custom scripts using the NDEx REST API and one of the available NDEx client libraries: Java, Python or R. In addition, web applications can communicate with NDEx via Javascript. Please refer to the the Developer's README page for more information and links to the relevant GitHub repositories and documentation.
Uploading via the NDEx Web User Interface
At this time, the NDEx web UI only allows the upload of networks in CX format. Support for the upload of tabular files and other standard network formats will be added gradually in 2019. To upload one or more CX networks to NDEX:
- click the Upload Networks button available in your "My Account" page
- Select the desired CX file(s) from your computer
- Once the list of files to upload is populated, click the green Upload All button to load your networks.
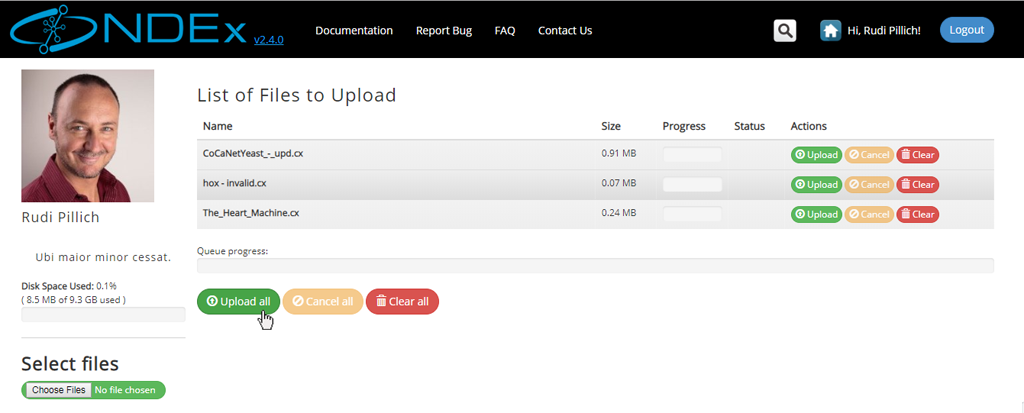
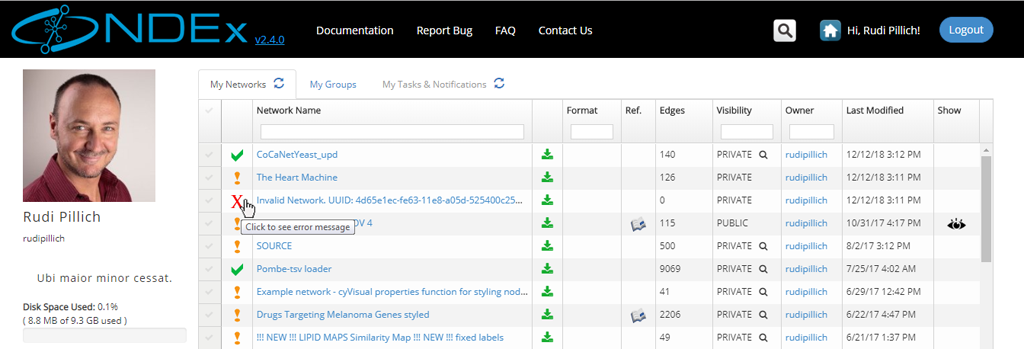
Depending on the size and number of files queued for loading, the process might take more or less time. When all the networks have been processed, they will appear at the top of the list in your "My Account" page:
- Networks loaded succesfully will have a green " checkmark " or an orange " ! "
- Networks that failed to be loaded will have a red " X "
- Clicking the orange " ! " or the red " X " will show informations about the warnings or errors respectively.
Sharing Networks Externally (Sharable URLs)
Sharing your private networks with external users is a frequently occuring use case considering the purpose of the NDEx platform. Users may want to collaborate with colleagues, include their networks in grant proposals or submit them for publication with their research article.
In all these cases, the networks should only be accessible by a limited number of people that you trust, such as your collaborators or journal editor. To achieve this, NDEx users can take advantage of the "Sharable URL", a feature similar to that available in Google Docs or Dropbox.
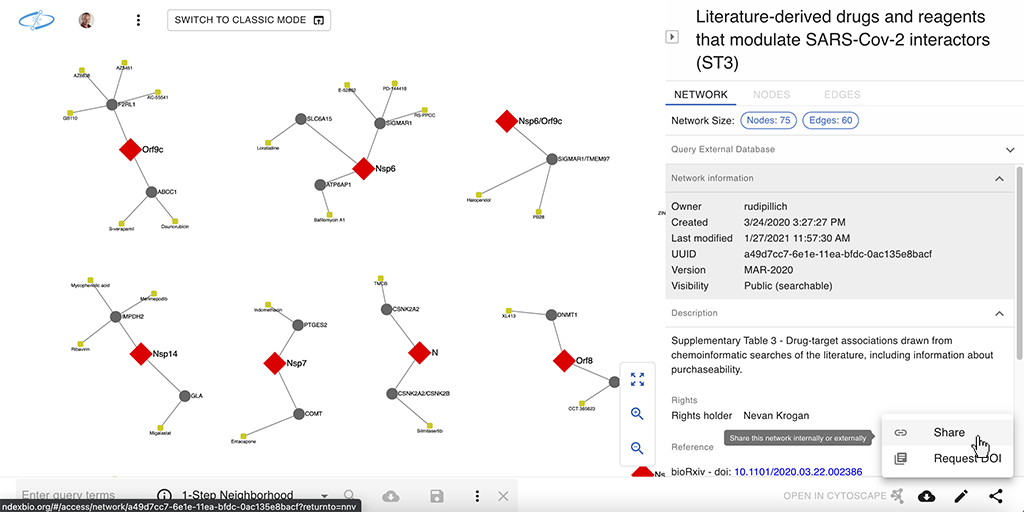
- To do so, select the private network you want to share, click the More button and choose the Share option from the drop-up menu:
- In the top part of the following page, you will see a button to Enable the "Sharable URL".
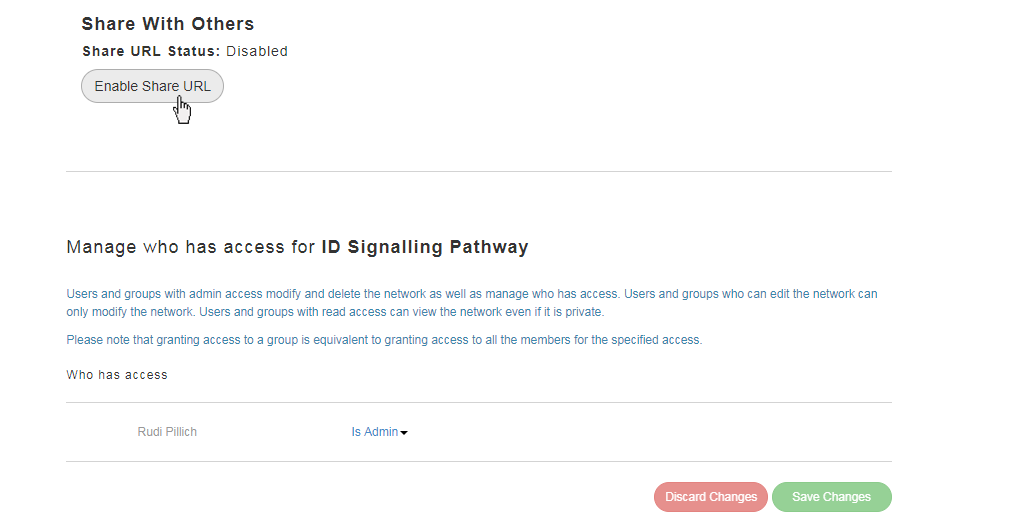
- After clciking the button, the "Sharable URL" status will change to Enabled and a new Copy URL button will conveniently allow you to copy it to your clipboard; then you can paste the URL in an email, include it in a grant proposal or reference it in your article submission.
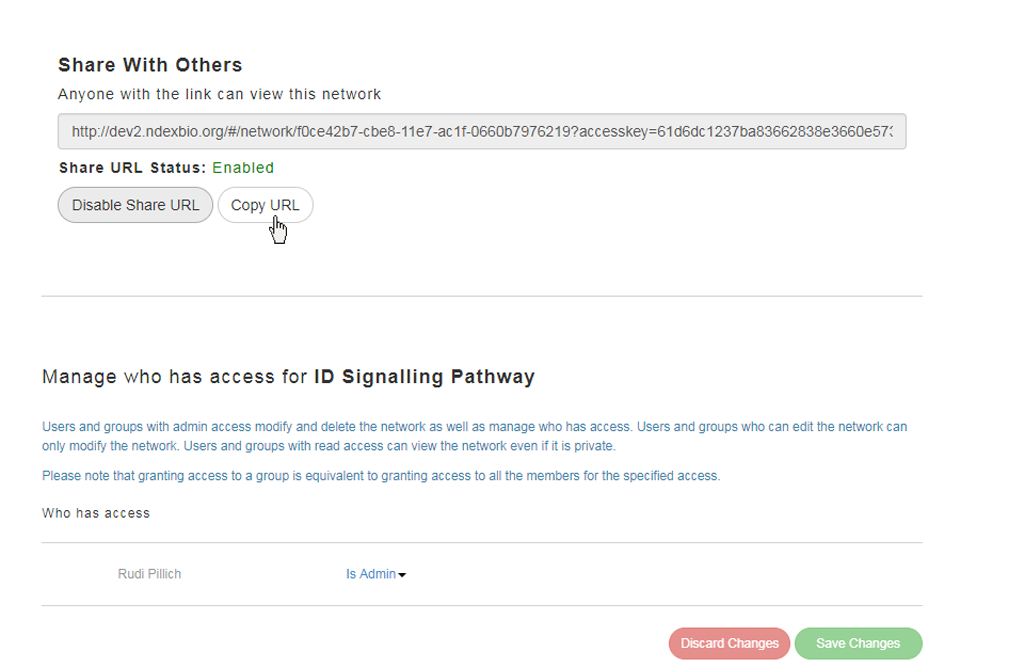
- Once the "Sharable URL" is enabled, anyone that has the link will be able to view and download your network: please make sure you share the link only with people you trust.
- Also, you can now conveniently share that same network directly from its page by using the green Copy URL button on the top part of the info panel as shown below:
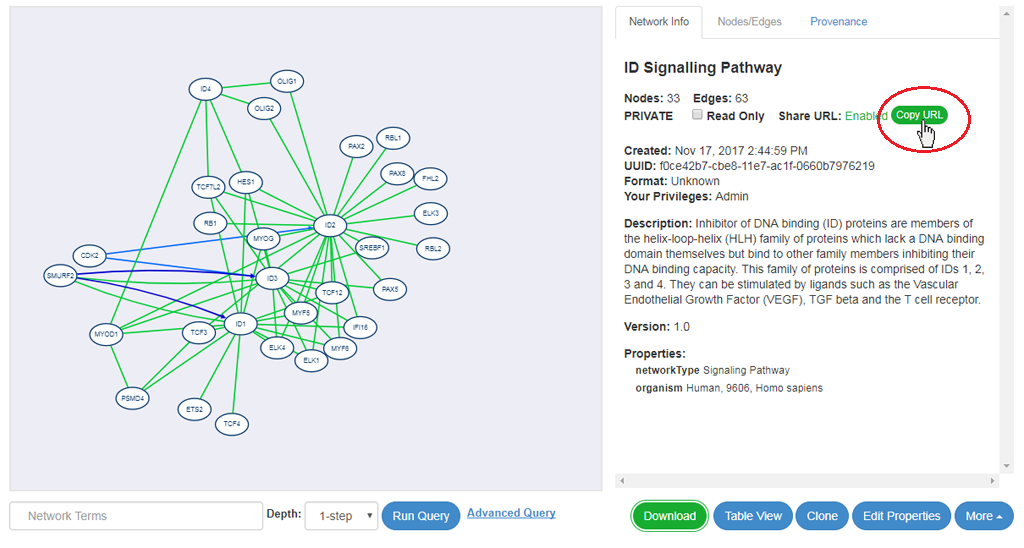
Sharing within NDEx
In case your collaborators are NDEx users as well, you can easily share your private networks with them using the NDEx built-in permission system. To begin, select the private network you want to share, click the More button and choose the "Share" option in the drop-up menu exactly as you did in the section above.
- In the bottom portion of the following page, you will see a table listing you as the network Admin and 2 search boxes, one for users (on the left) and one for groups (on the right).
- Search for the users and/or groups you want to share your network with and click the blue Add button to add them to the table.
- You can also decide what level of privilege each user and/or group should have: read, edit or admin.
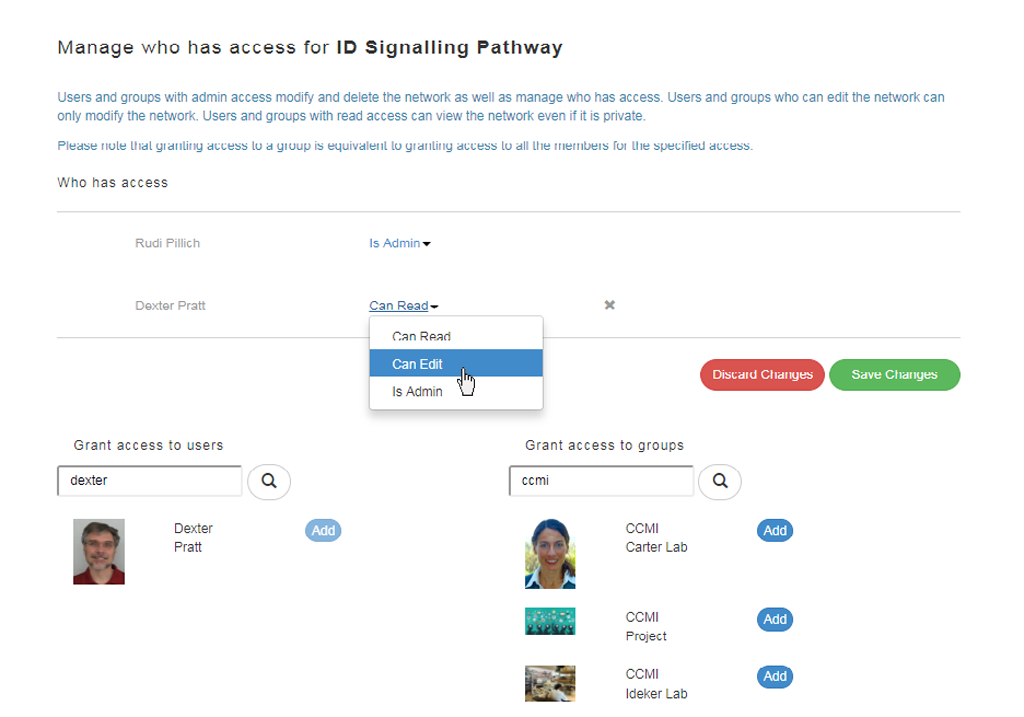
- When you are done adding users and deciding their privilege levels, clcik the green Save Changes button.
Requesting Access to a Network
If someone has shared a network with you giving you read permission and you would like to be able to edit the network instead, you can ask the owner to upgrade your privilege.
- To request an upgrade, select the network, click the More drop-up button and choose "Upgrade permission".
- A dialog window will appear allowing you add a personal message to justify your request:
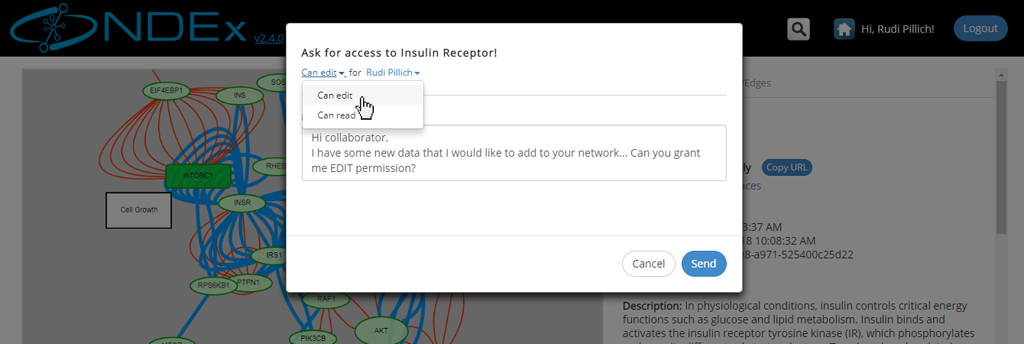
- All your access requests can be viewed in your NDEx Account page, under the "My Tasks & Notifications" tab. Initially their status will be pending, but it will change once the owner of the network responds to your request.

Granting Access to a Network
Similarly, someone could ask you to upgrade their privilege level on a network you own. Remember that granting edit permission on your network to another person means that this person will be able to modify your network, so this should only be done if you trust the person making the request.
In addition, if your network is a stable public reference, you should never grant edit permission to anyone! Instead, suggest him to create his own copy of the network using the "Clone" feature.
- All access requests to your networks are displayed in the "Tasks & Notifications" tab of your "MyAccount" page. In addition, whenever you receive requests from other NDEx users, our server will notify you by email.
- To visualize more details about the request and respond, click the request's description: a dialog box will allow you to accept or decline the request and add an optional message.
